Searching for clues to authenticate a statuette
Searching for clues leading to the authentication of a…
Home » Our services » Multi-scale tomography » Advanced non-destructive inspection
Novitom provides inspection of all types of parts using X-ray microtomography, followed by 3D image processing and analysis.
The unique properties of synchrotron radiation allow for high-resolution X-ray microtomography of any material without the need to cut or disassemble parts.
The use of tomographs operating at very high energy further enhances our offering to meet all your needs.

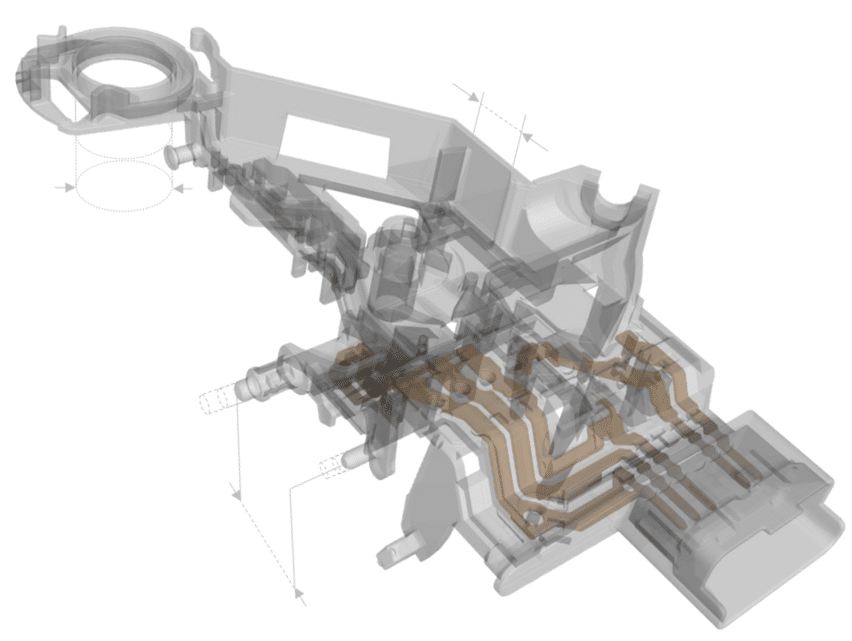
Whether you need to measure a material thickness, distances between walls, diameter, concentricity or compare the actual geometry of a part to its CAD model, Novitom’s experts offer highly accurate internal 3D dimensional control of all types of parts using X-ray microtomography, followed by quantitative image processing and analysis.
The unique properties of synchrotron radiation allow for high-resolution local measurements without the need to cut or disassemble parts, enabling local measurements in areas inaccessible with conventional techniques. These high-quality images allow you to create a digital library of defects and part models.
Our experts can tailor the deliverables to your specific requirements: 3D volumes of measured deviations, STL files, tomography volumes, for example.
Do you need to validate the conformity of a part after a manufacturing or processing procedure, or following its use?
Novitom offers quality control or material health analysis of all types of parts or products using X-ray microtomography.
Novitom’s experts in the relevant field analyse the 3D images using continuously improved proprietary AI based algorithms to deliver their findings in a report.
X-ray microtomography provides high-quality 3D images from which information can be extracted regarding the size and shape of any defects, their extent, location, and connectivity, in relation to product behaviour.
Novitom’s services cover both measurements and quantitative analysis of the reconstructed volumes.

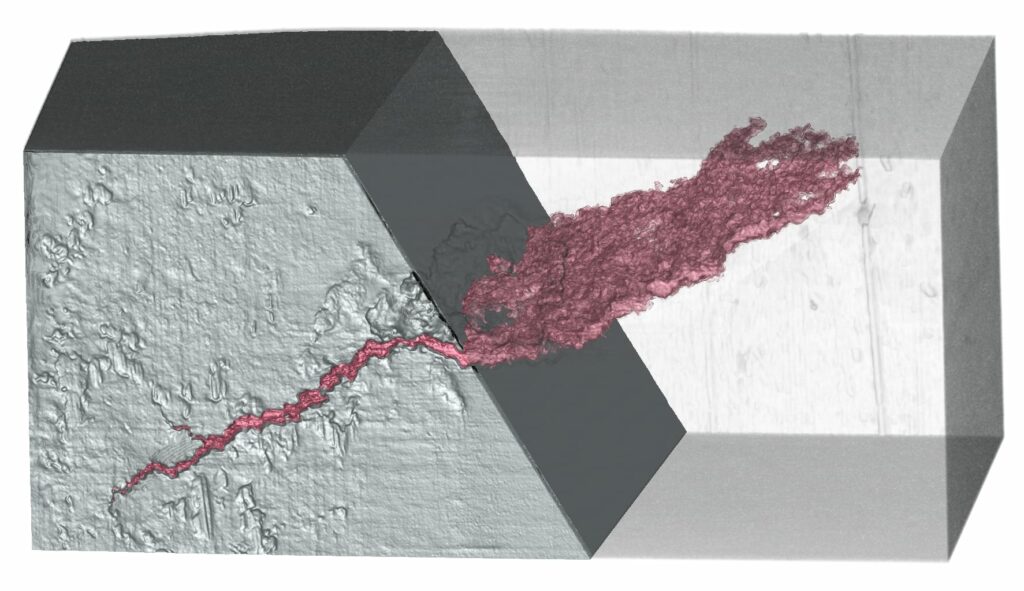
For any material or product failure, whether visible on the surface or internal, Novitom offers an analysis program based on tomographic reconstructions to visualise and measure failure zones and attempt to identify their origin.
Observations can be performed at different spatial resolutions, locally on a suspected area, or under mechanical stress. Novitom can also develop image analysis software tailored to your control needs, notably using AI.
If you’re looking to better understand the operation of a product or system lacking documentation, compare it to competitors’ offerings, identify potential patent infringements, or innovate by drawing inspiration from existing products, X-ray microtomography provides a complete digital representation, enabling you, for example, to reconstruct surfaces using CAD software. This innovative technique allows you to create a digital library of components and parts of interest.
Novitom can complement this offering with monitoring under mechanical, thermal, or operational stresses.
Searching for clues leading to the authentication of a…
High-resolution, high-energy X-ray tomography provides non-destructive access to the…
Why perform microCT during tensile/compression tests? The use of…
Over 20 years of experience in advanced tomography and interpretation of results on all types of materials
Accurate quantitative data, non-destructive and multi-scale inspections tailored to your application
Solutions tailored to your constraints, detailed reports and 3D visuals to facilitate decision-making